With Lambda GPU Cloud, you can begin generating images from prompts without having to buy expensive GPUs and other computer hardware.


In this tutorial, you’ll learn how to set up AUTOMATIC1111 (Stable Diffusion) and Dream Factory on a Lambda GPU Cloud on-demand instance—and start generating images right away.
Sign up for a Lambda GPU Cloud account
Sign up for a Lambda GPU Cloud account if you don’t have one already.
You won’t have to enter payment information when you sign up. However, you’ll need to enter payment information before you can launch any instances.
Launch an on-demand instance
From the dashboard, launch an instance.
Tip
For maximum performance, it’s recommended that you use a multi-GPU instance type, such as an 8x A100 (80 GB SXM4) or 8x A100 (40 GB SXM4). With a multi-GPU instance, you’re able to generate images on each GPU at the same time.Configure firewall rules for your account
Use the Firewall feature to allow your computer to access Dream Factory once it’s running on your instance.
-
Learn your computer’s IP address by visiting What Is My IP Address from your computer.
-
In the dashboard, click Firewall. Then, under Inbound Rules, click Edit.
-
In the Edit inbound rules dialog, click Add rule.
-
In the newly created rule, set Protocol to TCP and enter the following information:
- Port range:
8080 - Source:
YOUR-IP-ADDRESS - Description: Dream Factory
Replace YOUR-IP-ADDRESS with your computer’s actual IP address.
- Port range:
-
Click Update to enable the firewall rule you just created.
Log into your instance
To log into your instance using Jupyter Notebook:
-
Under Other, click Terminal.
You now have a terminal open that you’ll use to run various commands, below.
Install AUTOMATIC1111
Once you’re logged into your instance, copy and paste the following command into the terminal:
bash <(wget -qO- https://raw.githubusercontent.com/AUTOMATIC1111/stable-diffusion-webui/master/webui.sh)
Then, press Enter to run the command.
This command will download and install AUTOMATIC1111 directly to your instance. The download and install will take a few minutes to complete.
When the installation completes, you’ll see the following message:
Can't run without a checkpoint. Find and place a .ckpt or .safetensors file into any of those locations. The program will exit.
You can safely disregard this message. In the next step of this tutorial, you’ll install a model checkpoint.
Download a Stable Diffusion prompt-to-image model
Next, download the Realistic Vision V1.3 prompt-to-image model directly to your instance.
To download the model directly to your instance, copy and paste the following command into your terminal, then press Enter:
wget -O /home/ubuntu/stable-diffusion-webui/models/Stable-diffusion/realisticVisionV13.LtFu.safetensors \
https://civitai.com/api/download/models/6987
Note
Realistic Vision V1.3 is the model used to generate the images displayed at the beginning of this tutorial. However, you can use other models to generate images.Install Anaconda
Anaconda is used to create virtual environments and manage packages. Virtual environments can be separated from each other and manage different versions of Python and packages.
Install Anaconda by running:
wget https://repo.anaconda.com/archive/Anaconda3-2022.10-Linux-x86_64.sh && \
bash Anaconda3-2022.10-Linux-x86_64.sh
You’ll be asked to review a license agreement before you can continue. Press Enter to see the license agreement. Press Spacebar until you reach the end of the license agreement.
When you’re asked whether or not you accept the license terms, type yes to
accept the license terms. Then, press Enter.
You’ll now see:
Anaconda3 will now be installed into this location:
/home/ubuntu/anaconda3

  - Press ENTER to confirm the location
  - Press CTRL-C to abort the installation
  - Or specify a different location below

[/home/ubuntu/anaconda3] >>>
Press Enter to proceed with the installation.
Once the installation completes, you’ll see:
Do you wish the installer to initialize Anaconda3
by running conda init? [yes|no]
[no] >>>
Type yes, then press Enter.
When the installation completes and you’re back at the command prompt, copy and paste the following command into the terminal, then press Enter:
source .bashrc
Your command prompt should now look like:
(base) ubuntu@INSTANCE-IP-ADDRESS:~$
This command prompt indicates you’re in the base conda environment. In the next step, you’ll create and activate a virtual environment in which you’ll run Dream Factory.
Create, activate, and set up a conda virtual environment
In this step, you’ll create, activate, and set up a conda virtual environment that you’ll use to run Dream Factory.
-
To create a conda virtual environment, copy and paste the following command into your terminal, then press Enter:
conda create --name dream-factory python=3.9You’ll see
The following NEW packages will be INSTALLED:followed by a list of packages.Following the list of packages, you’ll see
Proceed ([y]/n)?.Press Enter to proceed with the creation of the conda virtual environment.
When creation of the conda virtual environment completes, you’ll be back at the command prompt.
-
To activate the conda virtual environment you just created, copy and paste the following command into your terminal, then press Enter:
conda activate dream-factoryThe command prompt in your terminal should now look like:
(dream-factory) ubuntu@INSTANCE-IP-ADDRESS:~$This command prompt indicates you’re in the
dream-factoryvirtual environment that you’ll use to run Dream Factory. -
To install packages needed to install Dream Factory, copy and paste the following command into your terminal, then press Enter:
conda install -c anaconda git urllib3At the
Proceed ([y]/n)?prompt, press Enter.
Install, configure, and run Dream Factory
-
Copy and paste the following command into your terminal, then press Enter:
git clone https://github.com/rbbrdckybk/dream-factory && \
cd dream-factory && \
python setup.py
This command installs Dream Factory. Installation of Dream Factory can take up to 10 minutes.
When the installation completes, you should see the following message:
All done! - don't forget to add your automatic1111 repo location to config.txt! -
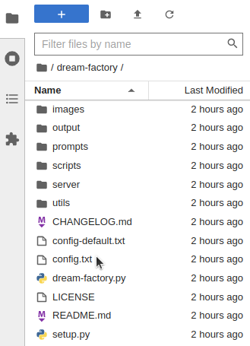
In the left sidebar of Jupyter Notebook, double-click the dream-factory folder to open the folder. Then, double-click the config.txt file to open the file.
Change line 7 so it reads:
SD_LOCATION = /home/ubuntu/stable-diffusion-webuiThis change tells Dream Factory where to find AUTOMATIC1111 that you installed at the beginning of this tutorial.
Change line 46 so it reads:
WEBSERVER_NETWORK_ACCESSIBLE = yesThis change tells Dream Factory to allow connections over the Internet, such as from your computer.
Close the tab and click Save to save your changes.
-
To run Dream Factory, copy and paste the following command into the terminal, then press Enter.
python dream-factory.pyYou’ll be able to access Dream Factory from your web browser once you see the following message:
[controller] >>> starting webserver (http://localhost:8080/) as a background process...
Access Dream Factory from your web browser
In your web browser, go to http://INSTANCE-IP-ADDRESS:8080.
Replace INSTANCE-IP-ADDRESS with the actual IP address of your instance.
Tip
You can find your instance’s IP address in the GPU instances dashboard. Click the IP address to copy it to your clipboard.You’ll be taken to the Dream Factory status monitor, where you can see the activity of each of your instance’s GPUs.
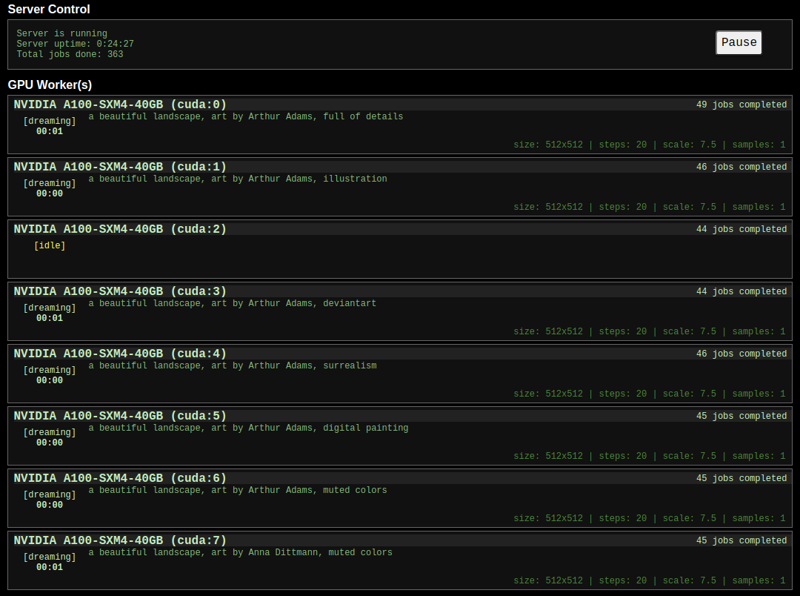
Note
The screenshot, above, shows Dream Factory running on all 8 GPUs of an 8x A100 (40 GB SXM4) instance.To begin generating images from example prompts:
-
In the top navigation bar, click Control Panel.

-
Under Prompt File, in the Choose a prompt file drop-down menu, choose either example-random or example-standard.
Dream Factory will begin continuously generating images. You can view these images by clicking Gallery in the top navigation bar.
To learn how to create your own prompt files, read Dream Factory’s usage documentation.
Tip
Here’s the prompt file used to generate the cute puppy image, below.

To use the prompt file:
In Jupyter Notebook, navigate to the / dream-factory / prompts / folder.
Then, click to upload the prompt file.
If you have questions about this tutorial, post them in the Lambda community forum.
Warning
Don’t forget to terminate your instance when you’re done using it!